
PACKINT - Chocolate Machines

How to Choose the Right Flexible Feeding System?

Choosing the right Flexible Feeding System can shape production speed, product quality, and daily operator workload. The best option is not always the fastest or most automated. It must fit the actual parts, process, and factory environment.

Start with the material being handled. Small molded components may feed differently from metal fasteners or delicate assemblies. Note each part’s size, weight, surface, and tendency to tangle. Then consider the required rate, changeover frequency, and space around the machine. A feeder that runs smoothly with one product may struggle when shapes or batch sizes change. That detail is easy to overlook.

A practical evaluation should include more than a brochure specification. Ask suppliers to test representative parts, including awkward or slightly inconsistent samples. Watch how parts orient, recover from jams, and respond to routine adjustments. Check whether operators can clean the system and switch products without lengthy stoppages. Also review controls, guarding, maintenance access, and available technical support. These factors affect reliability over time.

There is no perfect setup. A system optimized for speed may need more careful tuning, while a flexible design may require extra floor space. Be realistic about future product changes, but avoid paying for features the process will not use. Comparing test results, operating needs, and ownership costs gives teams a clearer basis for choosing. The right decision comes from evidence, not assumptions.
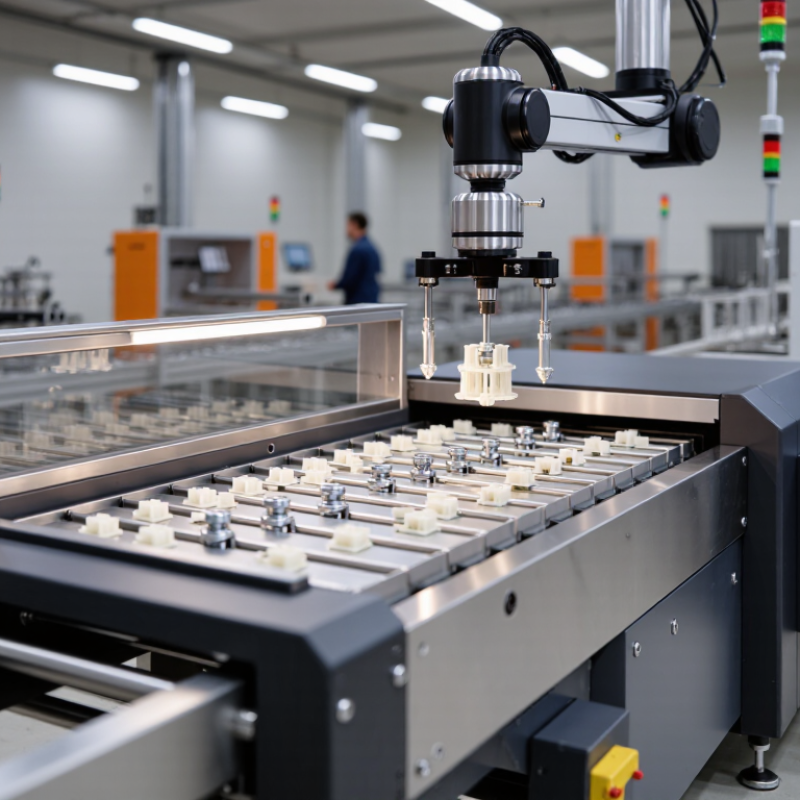
How to Choose the Right Flexible Feeding System?

Translate Part Requirements into Dimensions (mm), Mass (g), and Feed Rate

How to Choose the Right Flexible Feeding System?

Translate each part into measurable requirements before comparing feeding systems. Record its length, width, and height in millimeters, including the smallest and largest production variants. Measure a sample from the actual process, not just a polished drawing. Small details matter. A 12 mm clip with a narrow hook may behave differently from a simple 12 mm block.

Weigh parts in grams, and note any variation between batches. Mass affects how parts settle and move, but shape, surface finish, and center of gravity matter too. A light, flat plastic part can cling to a bowl or tray; a heavier metal part may collide and change orientation. Test real samples. It sounds obvious, yet this step is easy to skip when schedules are tight.

Set the required feed rate in parts per minute, using the downstream machine’s actual demand and planned operating pauses. If the line needs 40 parts per minute, verify that the feeder can sustain that rate with the chosen part mix, not just during a short demonstration. Include time for orientation and recovery after a misfeed. A rough trial can reveal useful problems, though it should not replace a longer production test. Leave room for uncertainty; calculated rates can look reassuring and still fail on Monday morning.

Match Feeder Type to Throughput (parts/min) and Changeover Frequency

Choosing a flexible feeding system starts with the real production rate, measured in parts per minute. A stable stream of one small component may suit a centrifugal or vibratory feeder. Delicate parts, however, can scuff or tangle when pushed too aggressively. A step feeder may handle them more gently, though its output can be lower. Check the rate at the point where parts reach the robot or assembly station, not just the feeder’s advertised maximum. A gap in presentation can slow the entire line.

Changeover frequency changes the calculation. If operators switch parts several times per shift, consider how quickly they can replace guides, adjust settings, and load a new vision recipe. A flexible feeder can reduce dedicated tooling, but it still needs sensible setup procedures. The awkward truth: fast changeovers on a demo bench may take longer beside a running line. Time the process with actual parts. Count good, correctly oriented parts for several minutes, then repeat after a changeover. Leave room for variation; parts from different batches may behave differently. A brief trial may not reveal every snag.

Size Vision and Robotics by Pick Rate, Accuracy (mm), and Payload (kg)

How to Choose the Right Flexible Feeding System?

Size Vision and Robotics by Pick Rate, Accuracy (mm), and Payload (kg)

Choose a system against real production conditions, not a best-case demonstration. Define pick rate as successful picks per minute over a sustained run, including replenishment and missed picks. The International Federation of Robotics reported 541,302 industrial robot installations worldwide in 2023 in World Robotics 2024. That figure shows automation’s scale, but it does not predict your feeder’s throughput. Part shape, surface finish, and bowl density matter. A clean lab demo can still mislead.

Tips: Test your actual parts. Record good picks per minute, mis-picks, and recovery time.

Specify accuracy in millimeters at the pickup point, not only the robot’s repeatability. ISO 9283 covers industrial robot performance measures, including pose accuracy and repeatability; vision calibration and tool alignment add their own errors. A 1 mm target may be too loose for a small connector, yet excessive for a large molded part. Check the complete tolerance stack. For payload in kilograms, include the gripper, cables, and workpiece, then allow for acceleration and off-center loads. I would leave margin rather than size to the brochure maximum; it costs space, but avoids a fragile setup.

Verify Robot-Cell Safety Against ISO 10218 Requirements

A flexible feeding system may combine a camera, vibrating bowl, conveyor, and robot in one compact cell. That layout can change whenever parts or recipes change. Verify the complete robot cell against the applicable edition of ISO 10218, not just the robot arm’s documentation. The standard addresses industrial robot safety and integration; confirm which edition and adoption apply to your project.

Start with a documented risk assessment. Check reach-through gaps, access doors, interlocks, presence-sensing devices, and stopping distances. A safety scanner may need a larger protective field when the robot carries a long part. Test safeguards at the actual operating speed and with the real tooling installed. Small details matter. An emergency-stop button is not a substitute for guarding or other required protective measures.

Review operating modes too: production, loading, fault recovery, and maintenance can create different risks. Confirm that safety-related control functions are designed, tested, and validated for the assessed hazards. Keep test records, including measured stopping times and any changes to feeder positions or robot programs. Do not assume. A tidy cell can still have a blind spot near a bin or service panel, and that is easy to overlook during commissioning. Have qualified personnel review the final setup before routine use.

How to Choose the Right Flexible Feeding System? – Verify Robot-Cell Safety Against ISO 10218 Requirements

Use this checklist when assessing a flexible feeding system that includes a robot, feeder, tooling, sensors, and cell controls. Confirm the applicable edition of ISO 10218 and local regulations for the installation.

Safety dimension What to verify Evidence or acceptance check Relevant reference
Risk assessment and system boundaries Assess the complete application—not only the robot—including feeding equipment, end effector, workpieces, conveyors, operator tasks, and foreseeable misuse. Document hazards, operating modes, people exposed, risk-reduction measures, and residual risks for setup, production, recovery, cleaning, and maintenance. ISO 10218-2; ISO 12100
Robot and cell integration Confirm that the robot, feeder, tooling, safety devices, and control system are integrated as a coordinated robot application. Review integration documentation, safety functions, operating instructions, and validation records for the completed cell. ISO 10218-1; ISO 10218-2
Access prevention and safeguarding Identify access points and protect people from hazardous robot motion, pinch points, ejected parts, and moving feeder components. Check guard construction, openings, access doors, and safety-device coverage against the risk assessment. Verify that reaching around, over, or under safeguards does not create an unprotected route. ISO 10218-2; ISO 14120; ISO 14119
Safety distances and presence sensing Where scanners, light curtains, or other presence-sensing devices are used, account for approach direction, stopping time, and the possibility of reaching into the hazard zone. Record the calculation and verify the installed protective distance using measured stopping performance and the device manufacturer’s instructions. ISO 13855; ISO 13857
Safety-related control functions Set the required performance of each safety function from the risk assessment. Consider guard interlocking, protective stops, enabling devices, and safe speed or position functions where applicable. Document the required and achieved performance level or safety integrity level, architecture, diagnostic measures, and validation results. ISO 13849-1; IEC 62061
Emergency stop Provide accessible emergency-stop devices for the application and ensure that activating one initiates the intended stop response. Test each device, confirm that reset does not restart the cell, and verify that emergency stop is treated as a complementary protective measure—not a substitute for guarding. ISO 10218-2; ISO 13850
Setup, teaching, and recovery Review how authorized personnel enter the cell for teaching, fault recovery, jam clearing, and adjustment. Consider reduced-speed operation and enabling controls where required. Verify mode selection, access control, stop behavior, and restart conditions. Ensure personnel can perform necessary tasks without bypassing safeguards. ISO 10218-1; ISO 10218-2
Collaborative operation If people may share space with the robot, define the intended collaborative method and assess the robot, tool, workpiece, and application together. Validate the selected protective measures and operating conditions. A collaborative-rated robot alone does not make the entire application safe for human contact. ISO 10218; ISO/TS 15066
Feeder, tooling, and workpiece hazards Check for sharp or hot parts, stored energy, entanglement, ejected components, and pinch or crush points created by feeders, grippers, and transfer mechanisms. Confirm that guarding, interlocks, safe loading methods, and instructions cover hazards beyond the robot’s reach and motion envelope. ISO 10218-2; ISO 12100
Electrical equipment and isolation Assess electrical hazards and energy sources, including pneumatic or hydraulic energy, during servicing and fault recovery. Verify electrical protection, isolation points, identification, and documented procedures for preventing unexpected start-up and releasing stored energy. IEC 60204-1; ISO 14118
Validation and change management Reassess safety when changing the robot program, feeder layout, tooling, workpiece, speed, or protective-device configuration. Keep test records for safety functions and stopping performance, plus updated risk assessments, drawings, instructions, and training records. ISO 10218-2; ISO 12100

Selection rule: Choose a flexible feeding system only after the integrated application has been risk-assessed and its safeguards and safety functions have been validated. Applicable standards and legal requirements depend on the country, installation date, and system configuration.

Compare OEE, MTBF, and Changeover Time for Lifecycle Cost

When comparing flexible feeding systems, purchase price tells only a small part of the story. Track overall equipment effectiveness (OEE), mean time between failures (MTBF), and changeover time under real production conditions. A feeder may run smoothly on one part but struggle with another’s shape or surface. Test representative components, including the awkward ones.

OEE shows how much planned production time becomes usable output. Record stops, speed loss, and rejected parts across multiple shifts. MTBF can indicate reliability, but a single average may hide repeated minor faults. Ask operators to log jams, sensor adjustments, and time spent clearing parts. Small interruptions add up. Check maintenance records, too; estimates without consistent records deserve caution.

Changeover time affects both labor and available production hours. Measure the full task, from the last good part of one run to the first accepted part of the next. Include bowl or track cleaning, recipe selection, and validation. Then calculate lifecycle cost using expected run hours, service needs, spare parts, and realistic changeover frequency. These inputs are not perfect. Product mix may change, and trial conditions can flatter performance. Keep the assumptions visible, and compare systems using the same parts and operating schedule.